Volutions - ID | News | Gadget | Tutorial | Freeware | Template | Etc.: appindicator
Showing posts with label appindicator. Show all posts

Indicator-Sensors Displays CPU / Motherboard Temperature On The Panel Using An AppIndicator [Ubuntu]

Indicator Sensors temperature Ubuntu

These days we've got a lot of comments requesting for a temperature monitor applet with Ubuntu AppIndicator support that displays the CPU / Motherboard temperature, Fan speed, etc. on the panel.

Well, great news! Alex Murray has created an Sensors AppIndicator which can display various temperatures and fan speeds as well as the GPU / fan speed for Nvidia graphics cards (if you have installed the "nvidia-settings" package only!).


Indicator-Sensors doesn't have a PPA yet so I've debianized it and uploaded it to the WebUpd8 PPA so you can install it already in Ubuntu 11.04. But please note that Indicator-Sensors is currently in alpha so it may not work for everyone, or you may find bugs. If that happens, report any bugs you may find @ Launchpad.


Install Indicator-Sensors In Ubuntu 11.04 Natty Narwhal


sudo add-apt-repository ppa:nilarimogard/webupd8
sudo apt-get update
sudo apt-get install indicator-sensors

Once installed, launch Indicator-Sensors from Dash (it's called "Hardware Sensors Indicator"). Then you'll need to configure it: click the appindicator and select "Preferences", then expand the various temperature modules you see in the Preferences dialog and check the box next to the temperature / voltage / fan speed you want to displayed on the panel.

Only one temperature will be displayed on the panel. To see the other temperatures you've enabled in the preferences you must click the appindicator (like you can see in my screenshot above).


To have Indicator-Sensors start automatically when you log in, launch "Startup Applications", add a new item and under command enter: "indicator-sensors".

Indicator-Sensors Displays CPU / Motherboard Temperature On The Panel Using An AppIndicator [Ubuntu]

Indicator Sensors temperature Ubuntu

These days we've got a lot of comments requesting for a temperature monitor applet with Ubuntu AppIndicator support that displays the CPU / Motherboard temperature, Fan speed, etc. on the panel.

Well, great news! Alex Murray has created an Sensors AppIndicator which can display various temperatures and fan speeds as well as the GPU / fan speed for Nvidia graphics cards (if you have installed the "nvidia-settings" package only!).


Indicator-Sensors doesn't have a PPA yet so I've debianized it and uploaded it to the WebUpd8 PPA so you can install it already in Ubuntu 11.04. But please note that Indicator-Sensors is currently in alpha so it may not work for everyone, or you may find bugs. If that happens, report any bugs you may find @ Launchpad.


Install Indicator-Sensors In Ubuntu 11.04 Natty Narwhal


sudo add-apt-repository ppa:nilarimogard/webupd8
sudo apt-get update
sudo apt-get install indicator-sensors

Once installed, launch Indicator-Sensors from Dash (it's called "Hardware Sensors Indicator"). Then you'll need to configure it: click the appindicator and select "Preferences", then expand the various temperature modules you see in the Preferences dialog and check the box next to the temperature / voltage / fan speed you want to displayed on the panel.

Only one temperature will be displayed on the panel. To see the other temperatures you've enabled in the preferences you must click the appindicator (like you can see in my screenshot above).


To have Indicator-Sensors start automatically when you log in, launch "Startup Applications", add a new item and under command enter: "indicator-sensors".

Glipper Gets Ubuntu AppIndicator Support

Glipper

Glipper, one of the most popular clipboard managers for GNOME finally got Ubuntu AppIndicator support in Natty. Previously, Glipper was a GNOME applet.

What makes Glipper interesting is that it uses plugins - some of the included plugins: support for Actions, Snippets and No-Paste services. Glipper can also display a popup (use Ctrl + Alt + C) for quick access.


The latest Glipper with AppIndicator support has been uploaded a few minutes ago into the Ubuntu 11.04 Natty Narwhal official repositories so you should get an update soon. For Ubuntu 10.10 Maverick Meerkat users, I've backported the latest Glipper from Natty so install it using the commands below:
sudo add-apt-repository ppa:nilarimogard/webupd8
sudo apt-get update
sudo apt-get install glipper

Update: for a Glipper Monochrome icon (to go with the default Ubuntu theme - Ambiance), run these commands in a terminal:
wget http://ubuntuone.com/p/9F9
sudo mv 9F9 /usr/share/icons/hicolor/22x22/apps/glipper.png

(Monochrome icon thanks to David Callé!)

Once installed, press ALT + F2 and type "glipper" to run it.

Click here for more appindicators. There's also a list on AskUbuntu.

Glipper Gets Ubuntu AppIndicator Support

Glipper

Glipper, one of the most popular clipboard managers for GNOME finally got Ubuntu AppIndicator support in Natty. Previously, Glipper was a GNOME applet.

What makes Glipper interesting is that it uses plugins - some of the included plugins: support for Actions, Snippets and No-Paste services. Glipper can also display a popup (use Ctrl + Alt + C) for quick access.


The latest Glipper with AppIndicator support has been uploaded a few minutes ago into the Ubuntu 11.04 Natty Narwhal official repositories so you should get an update soon. For Ubuntu 10.10 Maverick Meerkat users, I've backported the latest Glipper from Natty so install it using the commands below:
sudo add-apt-repository ppa:nilarimogard/webupd8
sudo apt-get update
sudo apt-get install glipper

Update: for a Glipper Monochrome icon (to go with the default Ubuntu theme - Ambiance), run these commands in a terminal:
wget http://ubuntuone.com/p/9F9
sudo mv 9F9 /usr/share/icons/hicolor/22x22/apps/glipper.png

(Monochrome icon thanks to David Callé!)

Once installed, press ALT + F2 and type "glipper" to run it.

Click here for more appindicators. There's also a list on AskUbuntu.

Get Evolution To Minimize To The Messaging Menu Instead Of Closing [Patched Evolution Indicator]

Evolution Indicator

I've seen numerous requests for making Evolution minimize to the Messaging Menu when closing the main window but for whatever reason, this wasn't implemented in Ubuntu.

But I've recently discovered a PPA for Ubuntu 10.10 Maverick Meerkat (I've only tested it in Ubuntu 10.10 and Evolution 2.30.3!) that provides a patched Evolution Indicator which allows you to close the main Evolution window yet still get new email notifications - basically the Evolution window is minimized to the Messaging Menu (Evolution Indicator) instead of closing.

Install the patched Evolution Indicator in Ubuntu 10.10 using the following commands:
sudo add-apt-repository ppa:goehle/goehle-ppa
sudo apt-get update
sudo apt-get install evolution-indicator

There is one bug though: when you click "Compose New Message" or "Contacts" in the Messaging Menu, both the main Evolution Window and the contacts / new mail windows open. But that's nothing major so if you're among those who were waiting for this feature ever since Ubuntu got the Messaging Menu / Indicators, I'm sure this won't stay in your way of using this patched Evolution Indicator.


Bote: Unfortunately there is no patched Evolution Indicator for Ubuntu 11.04 Natty Narwhal yet.

How To Enable Ubuntu AppIndicator For RadioTray

RadioTray AppIndicator


I was reading on forums / comments that a lot of people miss RadioTray in Ubuntu 11.04. You can enable the Systray and get RadioTray to work, but if it's just about RadioTray, you don't need to enable the Systray because RadioTray comes with an AppIndicator (it's not enabled by default).


So here's how to enable the RadioTray AppIndicator (this works for both Ubuntu 10.10 and 11.04).


Update: you can skip the manual steps below by using a PPA that comes with a patched RadioTray that enables the AppIndicator by default (thanks to eugenesan for the patched RadioTray PPA!). Please note that the PPA comes with quite a few packages and it will update other applications too so use it at your own risk!

Add the PPA and install RadioTray:
sudo add-apt-repository ppa:eugenesan/ppa
sudo apt-get update
sudo apt-get install radiotray


If you want to use the original RadioTray .deb from Sourceforge, here are the manual steps of enabling the AppIndicator for RadioTray (these were the initial instructions in this post before the update above):


1. Download the latest RadioTray (0.6.3) from  HERE and install it.

2. Important: run RadioTray - you must run RadioTray at least once so it creates the config files. Then close RadioTray (since you can't close it without a notification area in Ubuntu 11.04, simply open a terminal and type: "killall radiotray").

3. Now, to enable the AppIndicator for RadioTray, open ~/.local/share/radiotray/config.xml and modify the "<option name="enable_application_indicator_support" value="false">" value from "false" to "true", save the file and start RadioTray.

If you prefer to do this using a single command, just run this in a terminal to enable the RadioTray AppIndicator:

sed -i 's/\"enable_application_indicator_support\" value=\"false\"/\"enable_application_indicator_support\" value=\"true\"/' ~/.local/share/radiotray/config.xml

Haguichi (Hamachi GUI) 1.0.7 Gets AppIndicator Support

Haguichi

Haguichi is a popular Hamachi (including Hamachi2) GUI for Gnome.

Haguichi 1.0.7 has been released, the big news being that it finally adds AppIndicator support so you don't need to tweak the notification area in Ubuntu 11.04 to get Hamachi to show up (but of course, the AppIndicator works in older Ubuntu versions too). 

As usual, I've updated the Haguichi PPA (this is basically the official PPA) so you can easily stay up to date with new versions in Ubuntu 10.04, 10.10 and 11.04.

Please note that the Haguichi AppIndicator comes as a separate package!

Add the Haguichi PPA and install Haguichi using the commands below:

sudo add-apt-repository ppa:webupd8team/haguichi
sudo apt-get update
sudo apt-get install haguichi

To install the Haguichi AppIndicator, run the command below:
sudo apt-get install haguichi-appindicator

Indicator Applet To Mount CD / DVD Images: Mounty

Mounty

Mounty is a very simple indicator applet you can use to mount CD / DVD images. It supports ISO, IMG, BIN, MDF and NRG and besides mounting, it can also burn the images to a CD/DVD.

Mounty can also remember the mounted images and add it to startup with a single click. It's a very simple but effective little indicator applet.

Install Mounty in Ubuntu


Mounty is available in the TahuTEK PPA. Add it and install Mounty in Ubuntu 10.04, 10.10 or 11.04 using the following commands:
sudo add-apt-repository ppa:tldm217/tahutek.net
sudo apt-get update
sudo apt-get install mounty

Once installed, you'll find it under Applications > Accessories > Disk Image Mounter (Mounty).


Thanks to Damar for the PPA; AppIndicator created by Kasimir @ skss.learnfree.eu for creating this applet.

System Monitor Indicator Puts The CPU And Memory Usage On Your Panel

System Monitor Indicator

System Monitor Indicator is a new appindicator that displays your system CPU and memory usage on the panel - be it the regular Gnome panel or the new Unity top bar.

The info is displayed directly on the panel, without having to click anything. This may not sound like a good idea if you use a netbook, but if you have a 20'' or larger monitor, you probably have plenty of space on your top panel.

Maybe some option to display the info in a drop-down or chose what info is displayed (with the other being displayed upon clicking the appindicator) would be nice though. But this is the first System Monitor Indicator release so it has plenty of time to improve.

The System Monitor Indicator developer welcomes all ideas / suggestions so if you have an idea for a cool feature, leave a comment! Or submit a bug.


Download


System Monitor Indicator is available in a PPA but for Ubuntu 11.04 only so if you use Natty already, simply add the PPA and install "indicator-sysmonitor".

For Ubuntu 10.10 (I've actually only tested it in Maverick), simply download and install THIS deb file (for both 32bit and 64bit).


Want more AppIndicators? See here.

Touchpad-Indicator Now Automatically Disables The Touchpad When You Plug In A Mouse

Touchpad indicator


Touchpad Indicator was created with a very simple feature in mind: to allow you to easily enable / disable your laptop or netbook touchpad with a click but it slowly started gaining some other cool features. About two months ago, Touchpad Indicator got a nice feature that allows you to toggle the Touchpad on/off using a keyboard shortcut which is very useful for those that have issues with the Fn keys.

Today, Touchpad Indicator got yet another very interesting feature: it can automatically disable the touchpad when you plug in a mouse.

To use this new feature, you'll have to configure it first: click the Touchpad Indicator and select "Preferences", then click the "Configure" button - at this point you should see a window like this:

Touchpad Indicator - unplug mouse

You have to unplug your mouse (if connected) and click "OK". Then, another window will pop-up:

Touchpad indicator - plug mouse

Plug in your mouse and click OK. Once you do this, the configuration should be over (make sure the "Disable touchpad when mouse plugged" option is enabled!).

Install Touchpad Indicator in Ubuntu

Important: if you've previously installed Touchpad Indicator (or any other app from the Atreao PPAs), you need to add the PPA below as that is now the official PPA for all Atreao apps, including TouchPad Indicator, Picapy, My Weather Indicator and so on.

To add the Atareao PPA and install TouchPad Indicator, use the following commands:
sudo add-apt-repository ppa:atareao/atareao
sudo apt-get update
sudo apt-get install touchpad-indicator

In case you find any bugs, please report them to the Touchpad Indicator page @ Launchpad. You can also help translate Touchpad Indicator into your language.


Want more appindicators? Browse our appindicator tag.


Thanks to the TouchPad Indicator developer Lorenzo Carbonell @ atareao.es for the news!

Displex Indicator Can Now Enable/Disable The Screensaver, More [Version 0.6, Released]

Displex Indicator

Displex is an appindicator initially designed to provide similar functionality to the well-known "fusion-icon", but using an Ubuntu Indicator. However, Displex progressed and now provides a lot more features: it can be used to control the window decorations, screen rotation through Xrandr, switch between Metacity or Compiz compositing, provides AcerHK support and more.

A new version of Displayex (0.6) was released today, this version bringing some menu enhancements like stock GTK icons and radio buttons for the options. There are also some new features: control verbosity of messages and a demo mode which you can use to see all the Displex menus (by default, the menus which your computer does not support such as Disper and AcerHK are disabled).

Also, since our last post on Displex, it got some very interesting new features: you can now use Displex to show/hide the wallpaper, activate/deactivate the screensaver and there's also a new submenu for controlling direction of screen extension.

Download Displex (includes .deb)

Thunderbird Indicator Adds Folders Support

Thunderbird Messaging Menu

Thunderbird Indicator is an add-on for Mozilla Thunderbird which notifies you of new mail messages via Ubuntu's standard notification system and the Messaging menu. Once a new mail is received, the Messaging menu's icon turns green and a notification pops up. The Indicator Applet also provides quick access to your contacts and allows you to compose a new message.

A while ago we were telling you about a PPA that provides a package called "xul-ext-indicator" that integrates Thunderbird in the Ubuntu Messaging Menu. This is actually a Thunderbird extension packaged in a .deb so you can easily get updates.

Until now, "xul-ext-indicator" (Thunderbird Indicator extension) displayed a notification (using the Messaging Menu and NotifyOSD) for emails that arrived in your inbox so if you used filters for your emails, the extension failed to work. But a recent update fixes this so Thunderbird Indicator can now display notifications for emails received in any folder. If you want the old behavior (to only display notifications for emails arriving in your inbox), there is an option in the Thunderbird Indicator preferences:

Thunderbird Indicator Preferences


To install Thunderbird Indicator in Ubuntu (the "fixed" version is only available for Ubuntu 11.04 for now), use the following commands:

sudo add-apt-repository ppa:ruben-verweij/thunderbird-indicator
sudo apt-get update
sudo apt-get install xul-ext-indicator libnotify-bin

The latest version is only avilable for Ubuntu 11.04. In Ubuntu 10.10, you can try to install the 11.04 package or download this .deb I've created for Ubuntu 10.10 last week (this is the one I'm using - ignore the version number, it's actually 1.4).


Thanks to Radu for the screenshot!

'My Weather Indicator' 0.2.0 Released, New PPA For All Atareao Applications

Atareao.es has created quite a few Ubuntu applications which include Picapy, My Weather Indicator, Touchpad Indicator, Google Reader Indicator and more. Starting yesterday, all these great applications will be available from a single PPA: ppa:atareao/atareao. Add the PPA using the following command:

sudo add-apt-repository ppa:atareao/atareao && sudo apt-get update


My weather indicator

My Weather Indicator

Further more, 'My Weather Indicator' was updated today, the new version brining a new API for the Weather (the Google API is now used instead of the Weather Channel). In my test, there were't many cities available for my country but you can at least see all the available cities in a drop-down and if yours is not available, select one near it. Thanks to the new API, 'My Weather Indicator is a lot faster and there are fewer errors.

Other changes include new icons for the weather and new translations: German, Italian, Galician and French.

To install 'My Weather Indicator', simply add the Atareao PPA as stated in the beginning of the post, then use the following command:
sudo apt-get install my-weather-indicator

If you encounter any bugs, report them @ Launchpad.


TagPlayer Gets NotifyOSD Support, AppIndicator

TagPlayer

A new version of TagPlayer, a Linux music player plays your local music by using its Last.fm tags, was released today.

This version adds NotifyOSD notifications on track change and Ubuntu AppIndicator support. The current appindicator icon is not TagPlayer's icon but the appindicator isn't here to stay anyway as TagPlayer will soon get Ubuntu Sound Menu integration.

Install TagPlayer


To add the TagPlayer PPA and install it in Ubuntu 10.10 Maverick Meerkat, use the following commands:
sudo add-apt-repository ppa:hikibi/tagplayer
sudo apt-get update
sudo apt-get install tagplayer
For other Ubuntu versions, download TagPlayer (.deb) from its Launchpad page.


If you find any bugs, please report them @ Launchpad.

Displex-Indicator Reaches Version 0.4, Adds Metacity Compositing And Disper Support

Displex

Displex, an application that provides similar functionality as "fusion-icon", but using an Ubuntu appindicator, was updated to version 0.4.

The new version finally fixes the issue with the appindicator icons - if you use Ubuntu Mono Dark or Light, Elementary Monochrome, Faenza or Faenza Dark -, Displex should integrate nicely with no further tweaking.

Displex 0.4 also adds support for Metacity compositing and basic support for Disper and AcerHK (if you need drivers for this, see HERE). Further more, Displex now doesn't display the menu items for the applications which are currently not installed (so if you didn't install Emerald for instance, no menu item for it will show up).


Here are screenshots showing the Disper and AcerHK menu items:

Displex disper

Displex AcerHK


Please note that the Displex developer doesn't own an Nvidia graphics card so if you do and try out the Disper feature, let him know how it works!


Thanks to Arick McNiel-Cho for the tip and last 2 screenshots!

RadioTray 0.6.3 Released With Ubuntu AppIndicator Support, Sleep Timer

RadioTray 0.6.3

RadioTray is a minimalistic radio player stat runs in the notification area (system tray).

Finally a new version of RadioTray was released which adds support for Ubuntu appindicator, a new command line parameter "--resume" to play the last radio station before RadioTray was shutdown and a new sleep timer so you can go to sleep while listening using RadioTray. These features were actually included in the 0.6.2 version which was released yesterday but a bug prevented it from running so version 0.6.3 was released to fix that.

Install RadioTray 0.6.3 in Ubuntu


1. Download RadioTray Ubuntu .deb from Sourceforge and install it normally. If you encounter any issues, read on. If not, enjoy RadioTray!

Possible issues:

a) If you use the Faenza Icon theme installed from a PPA, the RadioTray installation will return an error and it will fail to install. Fix it using the following command:
sudo dpkg -i --force-all /var/cache/apt/archives/radiotray_0.6.3_all.deb #or replace with the path to where you've downloaded radiotray


b) If you've installed 0.6.2 and it failed to start for you, to be able to use 0.6.3 you'll have to run the following command (warning: it will remove all the configuration files):
rm -r ~/.local/share/radiotray


Enable AppIndicator

By default, Radiotray still uses the notification area in Ubuntu - that's because using the appindicator, there’s no tooltips and no mouse-scroll to control volume. But if you want to enable the appindicator for RadioTray, firstly run RadioTray (you need to to this so that the configuration file is created), then close it (if you're in Unity and can't close it properly, just run "killall radiotray" in a terminal), then run the following command in a terminal:
gedit ~/.local/share/radiotray/config.xml

And change the value for "option name="enable_application_indicator_support"" from "false" to "true".

Unity Gets A "Places Tile View", More [Natty Updates]

Unity received yet another update today, the most important change being a new "places tile view" - until now, clicking the Ubuntu logo in the top left corner would open Nautilus but this has now been replaced by a tile view:

Unity places tile view screenshot


The Places Tile View is not yet fully functional: clicking the top items it opens Nautilus. Further more, the design looks unpolished with no effects and a rough design but this will surely change.


Another change that was included in this update is something many have been asking for a long time now: the appindicators padding has been trimmed to 3 pixels:

appindicator ppadding


And finally, UbuntuOne got an update yesterday, binging a new dashboard:

Ubuntuone dashboard


But just like the new Places Tile View, there's still a lot of work to be done to the UbuntuOne dashboard as you can see in the above screenshot.

Displex: Fusion-Icon Alternative With Ubuntu AppIndicator Support

Displex

Displex (indicator-displex) is an application that provides similar functionality as "fusion-icon", but using an Ubuntu appindicator. It can be used to control Compiz, Emerald and the Gnome Display Manager.


You can use Displex to quickly activate / deactivate Compiz and window decorations (Metacity / Emerald), change screen orientation, toggle the Desktop icons on/off, quick access to CompizConfig Settings Manager and Emerald Theme Manager and more.

For now the applet doesn't seem to use Ubuntu Mono icons but this might be fixed in a future release (the author is still trying to figure how to do this).


Download Displex


Thanks to Arick McNiel-Cho for the tip!

Weather Indicator Lives On, Gets A New PPA

Weather Indicator

Weather Indicator is an Ubuntu appindicator that displays the current weather. Its development stopped a while back and the PPA was removed but Vadim Rutkovsky brought Weather Indicator back to life - for the past two weeks he's been fixing bugs for the old Weather Indicator and also, he has created a new PPA for easy installation.


Weather Indicator features:
  • Notifications support for severe weather or every weather condition change
  • the temperature unit can be set to Celsius, Fahrenheit or Kelvin
  • Multiple locations support
  • Extended weather
  • Sunlight/Sunset support with day/night icons
  • The Applet can find your location for you


Weather indicator forecast
(Weather Indicator Forecast)


See our previous posts on Weather Indicator for more info:


Install Weather Indicator

To add the new Weather Indicator PPA and install it in Ubuntu Maverick and Natty, use the following commands:
sudo add-apt-repository ppa:weather-indicator-team/ppa
sudo apt-get update
sudo apt-get install indicator-weather

Then you can start the initial setup assistant by going to System > Preferences > Weather Indicator Preferences.

Remember to submit any bugs you may find @ Launchpad.


See also: 'My Weather Indicator': A New Ubuntu Weather Appindicator

Parcellite Has A New Developer (And A New Version); ClipIt - Parcellite Fork With Ubuntu AppIndicator Support

Parcellite

The Parcellite (one of the best Linux clipboard managers) development stopped a while back and for a year there were no new versions. But Vladi pointed out in a comment that a new developer took over the project back in December and a new version has already been released: 0.9.3.

Changes in Parcellite 0.9.3 (released December 20, 2010):
  • Fixed 100% CPU bug that occurs with certain clipboard data.
  • Fixed list not staying at the top of the list.
  • Added patch that corrects clipboard losing text data when app closes (Thanks, sarahstrong).
  • Added more man page information.


As you can see, there are only bug fixes for now, but it seems Parcellite will also get new features soon:

I am still going through the bug reports, patches, and feature requests. Pending means I’m evaluating/testing/validating, and there’s a good chance it will make it into the next release.

Because such a great application needs an easy way to be installed, I've created a PPA for Parcellite so Ubuntu (Karmic, Lucid and Maverick) users can easily install the latest version. Add the PPA and install Parcellite 0.9.3 using the following commands:
sudo add-apt-repository ppa:webupd8team/parcellite
sudo apt-get update
sudo apt-get install parcellite


Parcellite with Ubuntu AppIndicator? ClipIt!


ClipIt

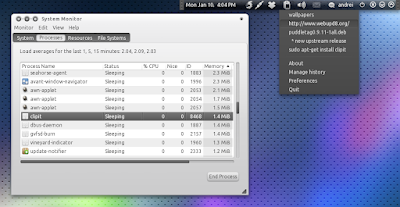
Parcellite doesn't have Ubuntu indicator support but for that you can use ClipIt, a Parcellite fork that uses an Ubuntu appindicator and also comes with some other fixes and improvements. The recent changes in Parcellite 0.9.3 have also been included in ClipIt.

To install ClipIt in Ubuntu, use the following commands:
sudo add-apt-repository ppa:shantzu/clipit
sudo apt-get update
sudo apt-get install clipit


Thanks to Vladi for both the Parcellite and ClipIt tips!
 
Support By Blogger